
At-Home Skin Brightening

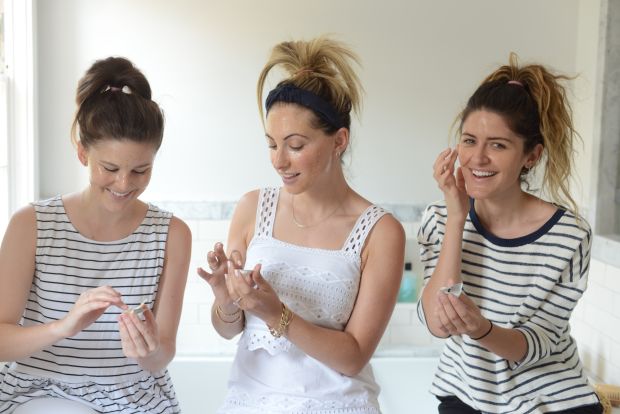
I first heard of the skincare line OleHenriksen from a friend who tried the Power Peel, perhaps their most well-known product. After my initial introduction, the brand kept popping up in conversations with others, who raved about it with cult-like reviews. When they approached our team about their latest launch, Power Bright, we were excited to give it a try. It’s similar to the original (the peel), but packed with vitamin C to leave skin bright and glowing. We went through the three-stage process and shared our thoughts below.
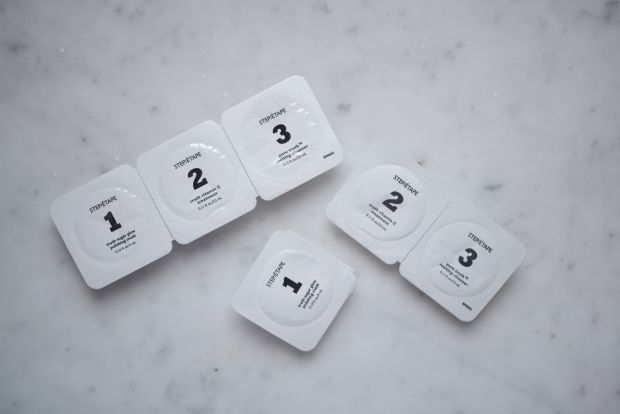

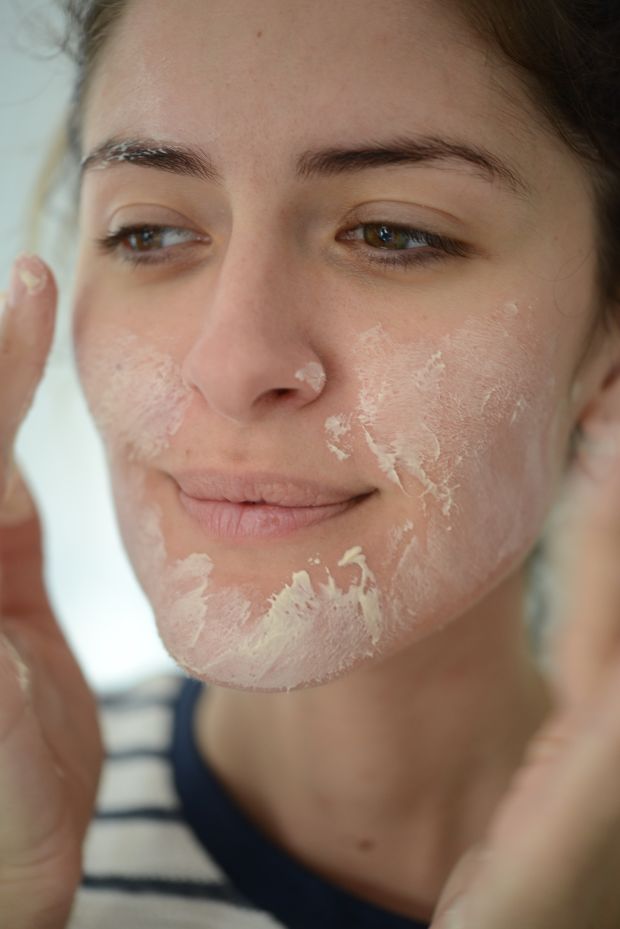
Step 1: Polish
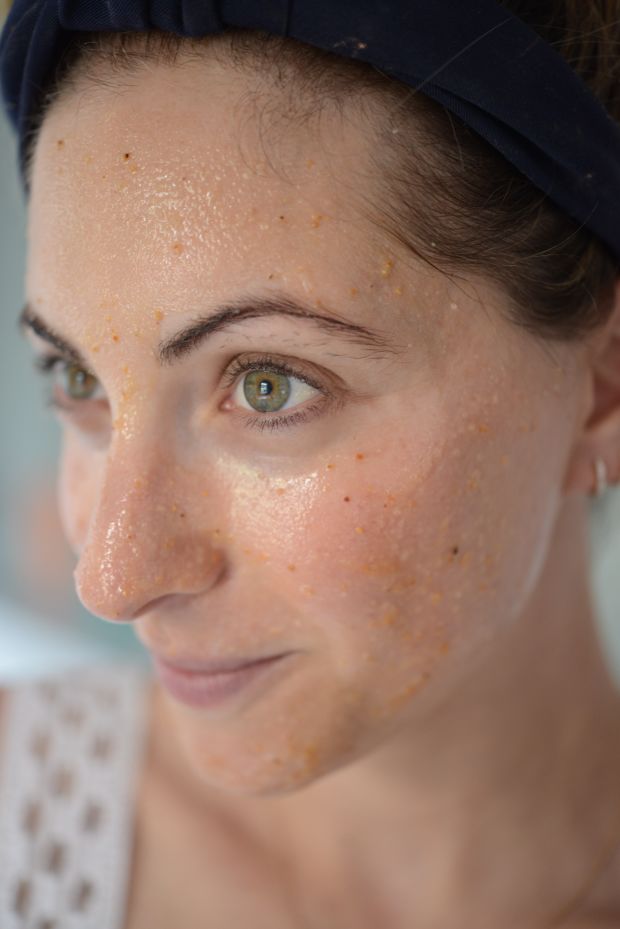
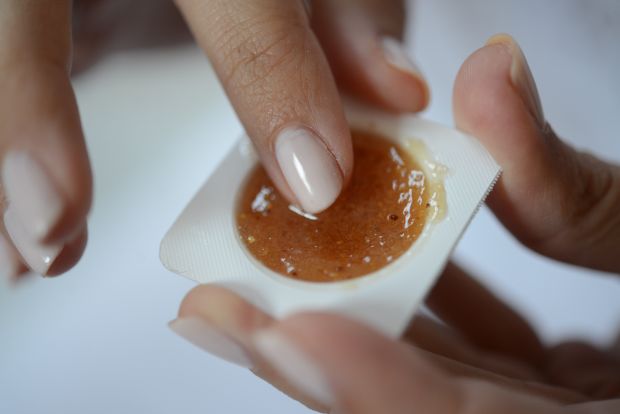
The first step of the process gets your skin ready by scrubbing away dead, dull skin with a honey and pomegranate sugar scrub. You apply the polish to your skin, wait five to ten minutes, then massage warm water in and rub in gentle circles before washing off.
Emily’s Takeaway: I’m a very tactile, visual, and results-driven person, so this step was especially rewarding for me. It was gritty but gentle, super moisturizing, and all around satisfying to apply.
Alina’s Takeaway: I had the same experience as Emily and it got me really excited for the next two steps. It was one of those things where you could tell from how well the first step was working that the next two were going to be good. It felt luxurious and spa-like to do at home too—like I was really giving myself a facial and treating my skin more deeply than I ever usually do. I loved it. As a side note, we got a little taste of the grit in our mouths and it tasted like citrus candy.
Leslie’s Takeaway: This step felt immediately gratifying—as soon as I started to use it, I could feel my skin getting smoother as I wiped away the dead cells. I also appreciated that it gets left on for several minutes. The minimal effort, where you can hang out and do something else while the product goes to work, is exactly what I look for in my skincare routine.
Step 2: Brighten
The second step provides your skin with the key nutrients it needs, with stabilized 25% vitamin C that helps to diminish fine lines and fade dark spots. You leave it on for two to three minutes, and then layer Step 3 over it.
Emily’s Takeaway: I really leaned in to the product and process for this step. I love rituals, and am deliberate and precise with how I apply products, so it was fun to carefully apply this indulgent one. It was a thick, opaque cream, so you can see which parts of your skin you’ve smoothed over.
Alina’s Takeaway: This was probably the most delightful step for me. The product was so goopy and emollient. It was like scooping your finger through pudding. It was utterly creamy to apply and didn’t feel tight or dry, like typical face masks.
Leslie’s Takeaway: I’m not a huge face mask-user since I find that most masks leave my skin feeling dry, but this mask felt more like a lotion. As it dried, I didn’t get the pinching sensation that most masks result in, and instead felt like my face was being hydrated. Plus we all looked like mimes at the end (always a bonus, in my book).
Step 3: Glow
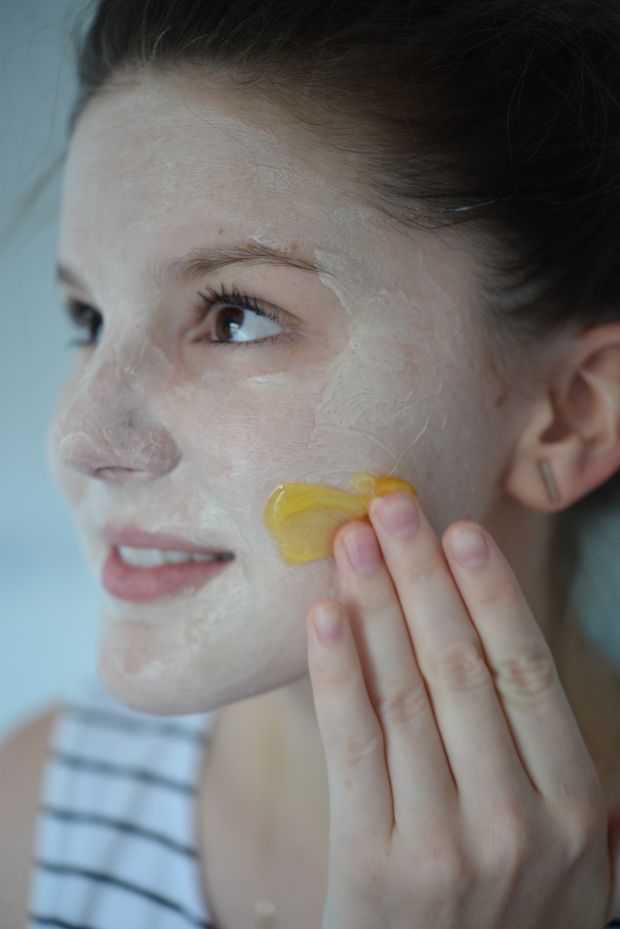
Once you’ve let the second mask set, it’s time to put the final cleanser over it. After leaving it over the cream to activate it, everything gets rinsed off. The third step adds even more vitamin C, along with virgin cherry and rose hip seed oils to complete the system, before everything is rinsed off with a soft sponge.
Emily’s Takeaway: The product at this step says to expect a light tingling and warming sensation as the treatment is activated, so I was a little nervous anticipating my skin freaking out, but none of the three of us felt anything at this stage, which was nice. My favorite part of the process was getting to use the little sponge that came with the system. It’s flat as paper how it comes in the product box, but immediately expands to sponge-size when you run it under water. I loved getting to swipe it over my face to remove the product and see the results underneath.
Alina’s Takeaway: This step was like an ultra soothing, gooey gel. It looked and felt a bit like applying egg yolk, which was cool. If the cream before felt hydrating, adding this on top and sort of blending the layers took the moisturizing to a whole other level. I could have played with the silky effect of rubbing this formula on top of the cream for hours. I also loved wiping it off with the sponge.
Leslie’s Takeaway: This was by-far my favorite part of the process. Since I spend a lot of my time outside, my skin is often dry, and far from what I would describe as “radiant,” so I felt like it was drinking up the vitamin C (instead of way too much vitamin D). When I wiped the layers off with the dampened complexion sponges, I was thrilled to see how much brighter my face looked—and how much smoother it felt!
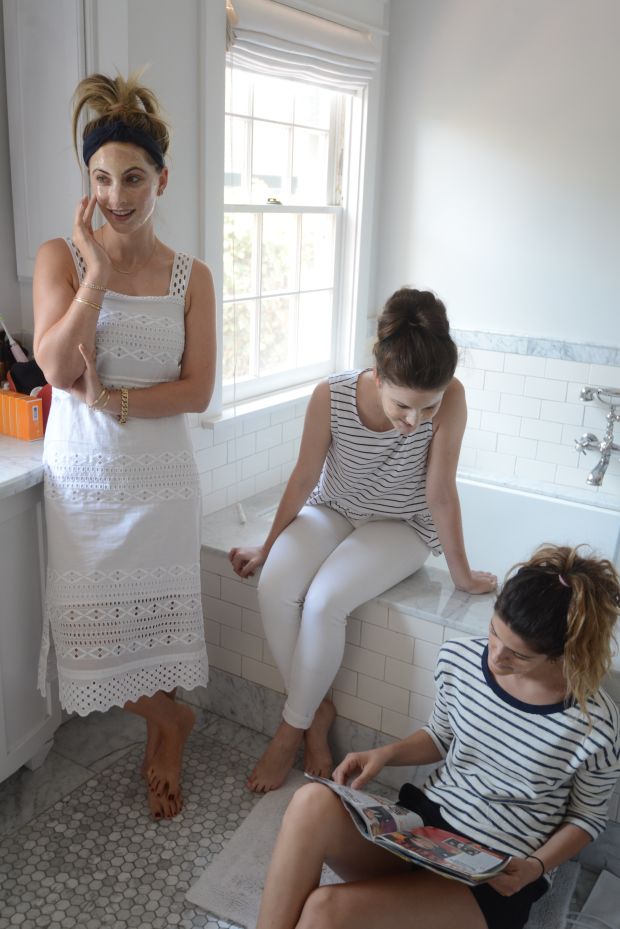

Emily’s Takeaway: My skin felt amazing, and I noticed an immediate impact on fine lines and wrinkles. It looked like the lines around my eyes and forehead had visibly diminished. Alina said my forehead looked tight, and everything just felt supple and soft. The biggest unexpected difference was in how smoothly my makeup applied after and the way it looked. It simply glided on and looked significantly better than usual. We added a little for the photos so you could see how glowy our complexions looked. I texted Alina later that night to say, “so my skin looks really good…” Leslie has such pretty baby skin already, because she’s 24, but hers definitely had a great glow.
Alina’s Takeaway: The way I’d describe the results are: light, tight, and bright. Emily said I looked like I had no wrinkles, which was a nice observation coming from the outside. I primarily noticed clarity. My skin looked radiant, which carried over to the next morning, after I’d washed my makeup off at night and slept. I woke up with clear skin, and literally did not put on a single drop of makeup before work that next day, which I never do.
Leslie’s Takeaway: Beyond putting on SPF foundation every morning, I amrough on my skin. I spend way too much time in the sun (hello, freckles) and have had enough glowing-red sunburns to make any dermatologist cringe, so I often take an “Oh, well,” approach to it, but this experience made me reconsider completely. After I saw how glowy my skin looked the next morning, I realized the importance of taking care of it so that it not only lookshealthier but is healthier—even without my daily layer of luminizer. I’ll definitely be adding this to my weekly routine, especially during the summer months when I’m spending so much time outside.
